You don’t need to figure everything out at once.
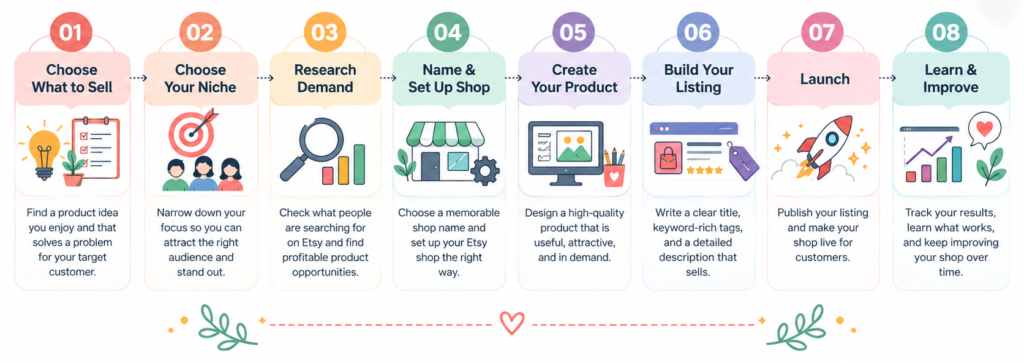
Starting an Etsy shop is really a series of small steps. Once you break the process down, it becomes much easier to understand what you need to do first, what can wait, and where you should actually spend your time.
In this guide, I’ll walk you through the process of starting an Etsy shop from the ground up — from choosing what to sell to creating your first listings and getting your shop ready for customers.
And if you’re a visual learner, I’ve also included an Etsy shop setup tutorial below so you can see the process instead of just reading about it.
Before You Open Your Etsy Shop, Start Here
Before you even create your Etsy account, there’s one question you should answer:
What are you going to sell?
It sounds obvious, but this is where you should start.
A common beginner mistake is opening an Etsy shop first and then trying to figure out what to sell afterward.
That’s backwards.
Your products will influence your niche, your branding, your customers, your keywords, and even the type of content you create to promote your shop.
So before worrying about logos and banners, spend some time thinking about your product idea.
If you’re interested in digital products, you could explore categories such as:
- Printable planners
- Kids’ worksheets
- Coloring pages
- Activity books
- Wedding templates
- Party printables
- Business templates
- Social media templates
- Budget planners
- Digital stickers
- Wall art
- Educational resources
You don’t need to choose ten categories.
In fact, starting with one clear direction can make the entire process easier.
Step 1: Choose a Niche
A niche simply gives your shop a clear direction.
Instead of thinking:
“I want to sell printables.”
go one step further.
Maybe you want to sell:
Printables for parents of preschoolers.
Or:
Templates for small business owners.
Or:
Wedding printables for modern brides.
Or:
Educational resources for early learners.
The more clearly you understand your ideal customer, the easier it becomes to decide what products to create.
Think about it like this:
Audience → Problem → Product
For example:
Busy parents → Need easy activities for children → Printable activity packs
That’s a much stronger starting point than simply deciding:
“I’m going to sell PDFs.”
Step 2: Research What People Are Looking For
Now comes the part you shouldn’t skip.
Research.
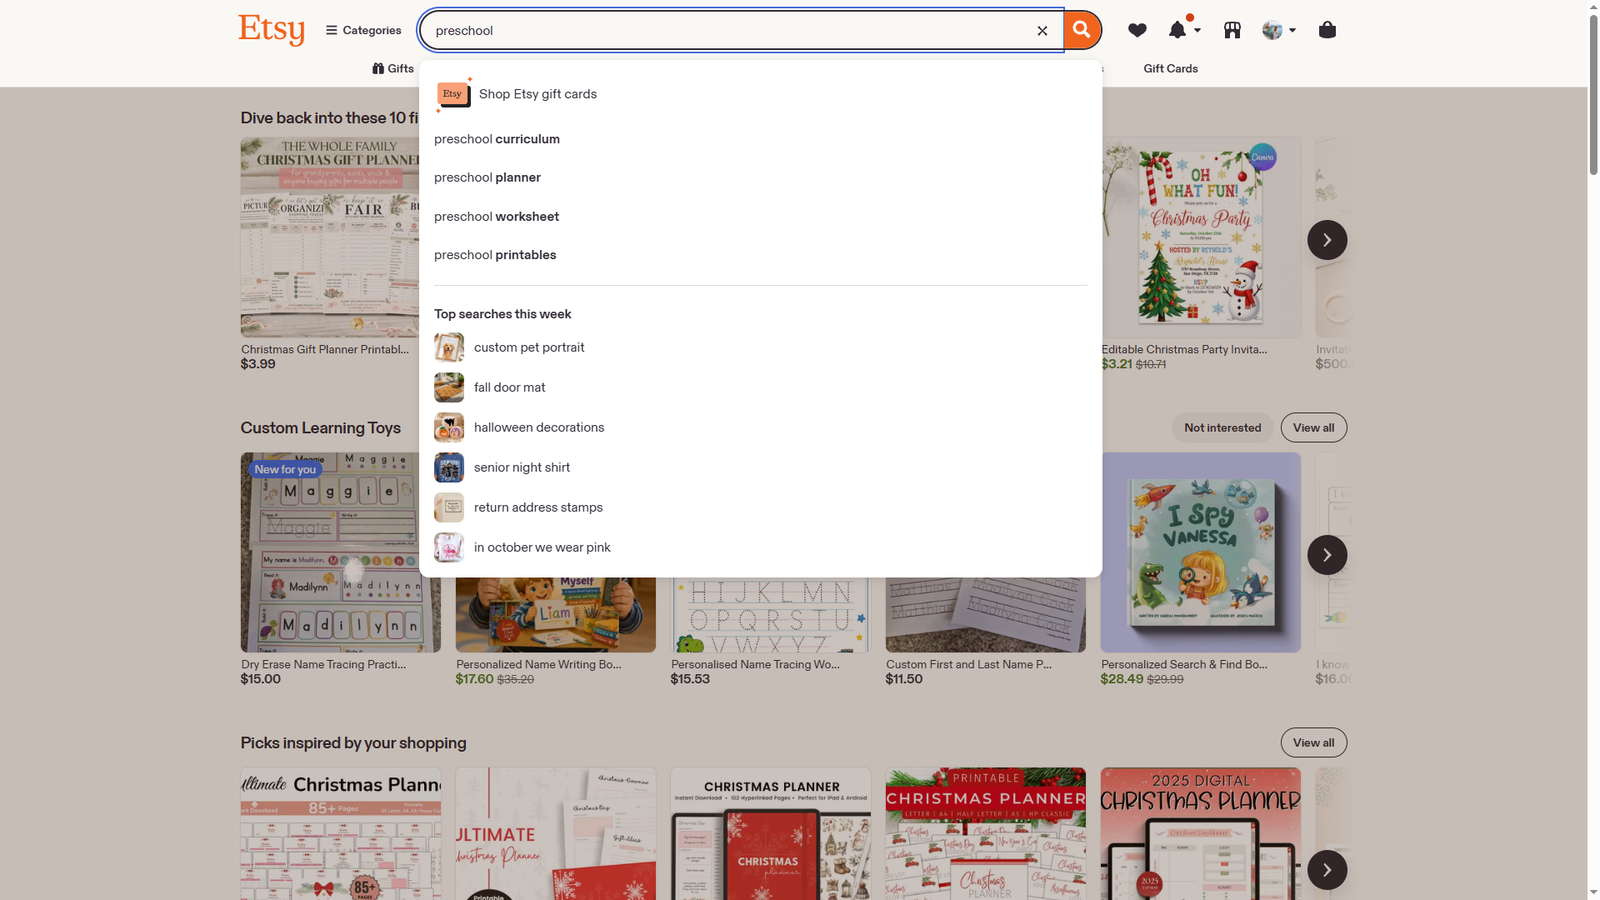
Before spending hours designing your product, find out what shoppers are actually searching for.
Go to Etsy and start typing phrases related to your idea.
Pay attention to the suggestions that appear.
Then look at existing listings.
Don’t copy them.
Study them.
Look at:
- Product titles
- Thumbnail designs
- Pricing
- Number of pages
- Product variations
- Listing images
- Reviews
- Customer complaints
- Questions buyers are asking
Reviews can be especially useful.
They can reveal what customers liked about an existing product and what they felt was missing.
And that gives you something valuable:
Ideas for making your own product better.
Step 3: Pick a Shop Name
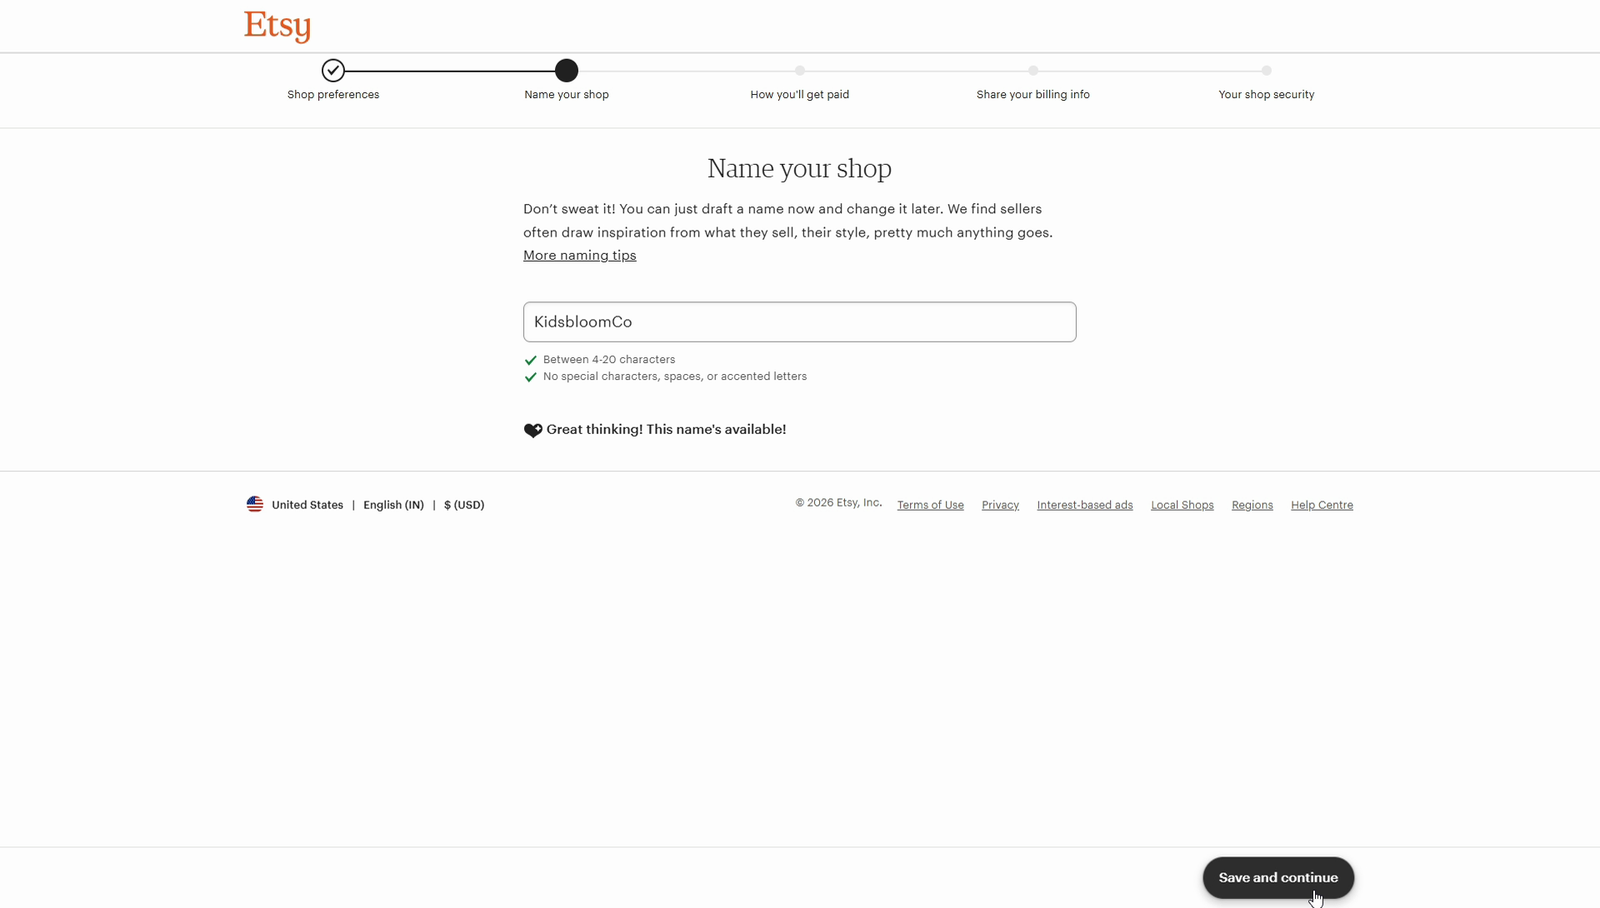
Once you have a direction for your shop, it’s time to think about your name.
Don’t get stuck here.
Your Etsy shop name doesn’t need to explain your entire business.
It simply needs to be memorable, easy to spell, and flexible enough to grow with you.
Imagine starting with kids’ printables and eventually adding planners, educational resources, or activity books.
A name that isn’t overly restrictive gives you more room to expand.
And here’s something important:
Your shop name isn’t what will make or break your Etsy business.
Your products and listings matter much more.
So choose a good name and keep moving.
Step 4: Set Up Your Etsy Shop
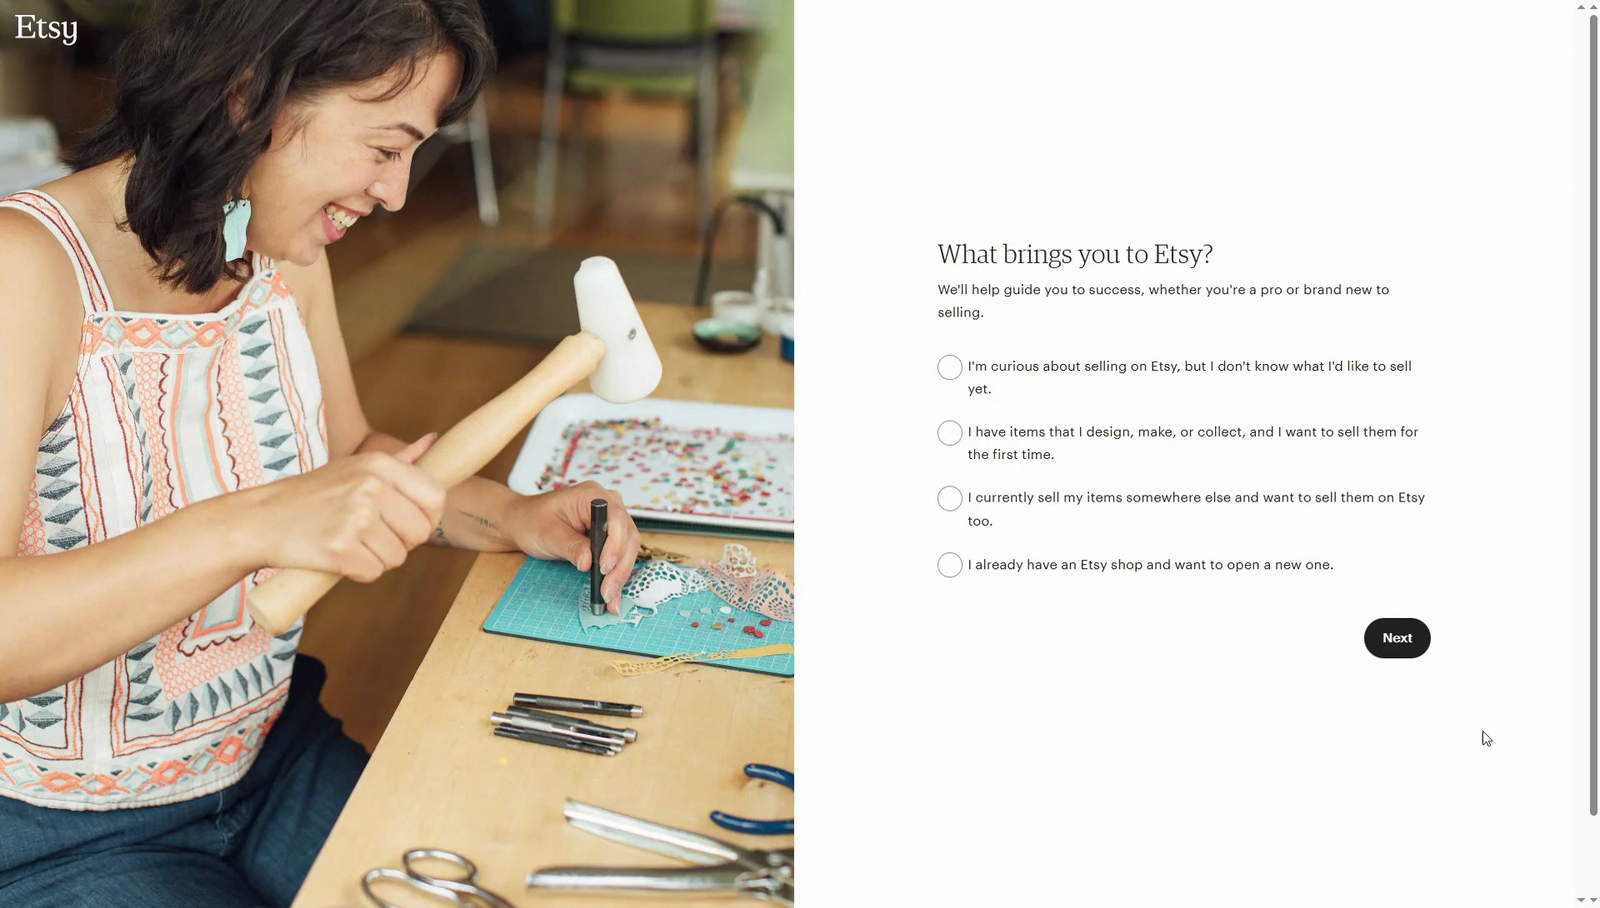
Now you’re ready to create your Etsy shop.
This is where you’ll enter your shop information and work through Etsy’s setup process.
You’ll need to provide the required information for your seller account, choose your shop name, configure payments, and complete the necessary setup steps.
If you’re selling digital products, you’ll also want to understand the difference between a physical listing and a digital listing before publishing your products.
And this is actually a good point to stop reading for a moment.
In the tutorial, you can follow along as the shop is created and see where everything goes instead of trying to figure it out from screenshots or written instructions.
Tip: Keep this guide open while watching the video so you can complete each step as you go.
Step 5: Make Your Shop Look Professional
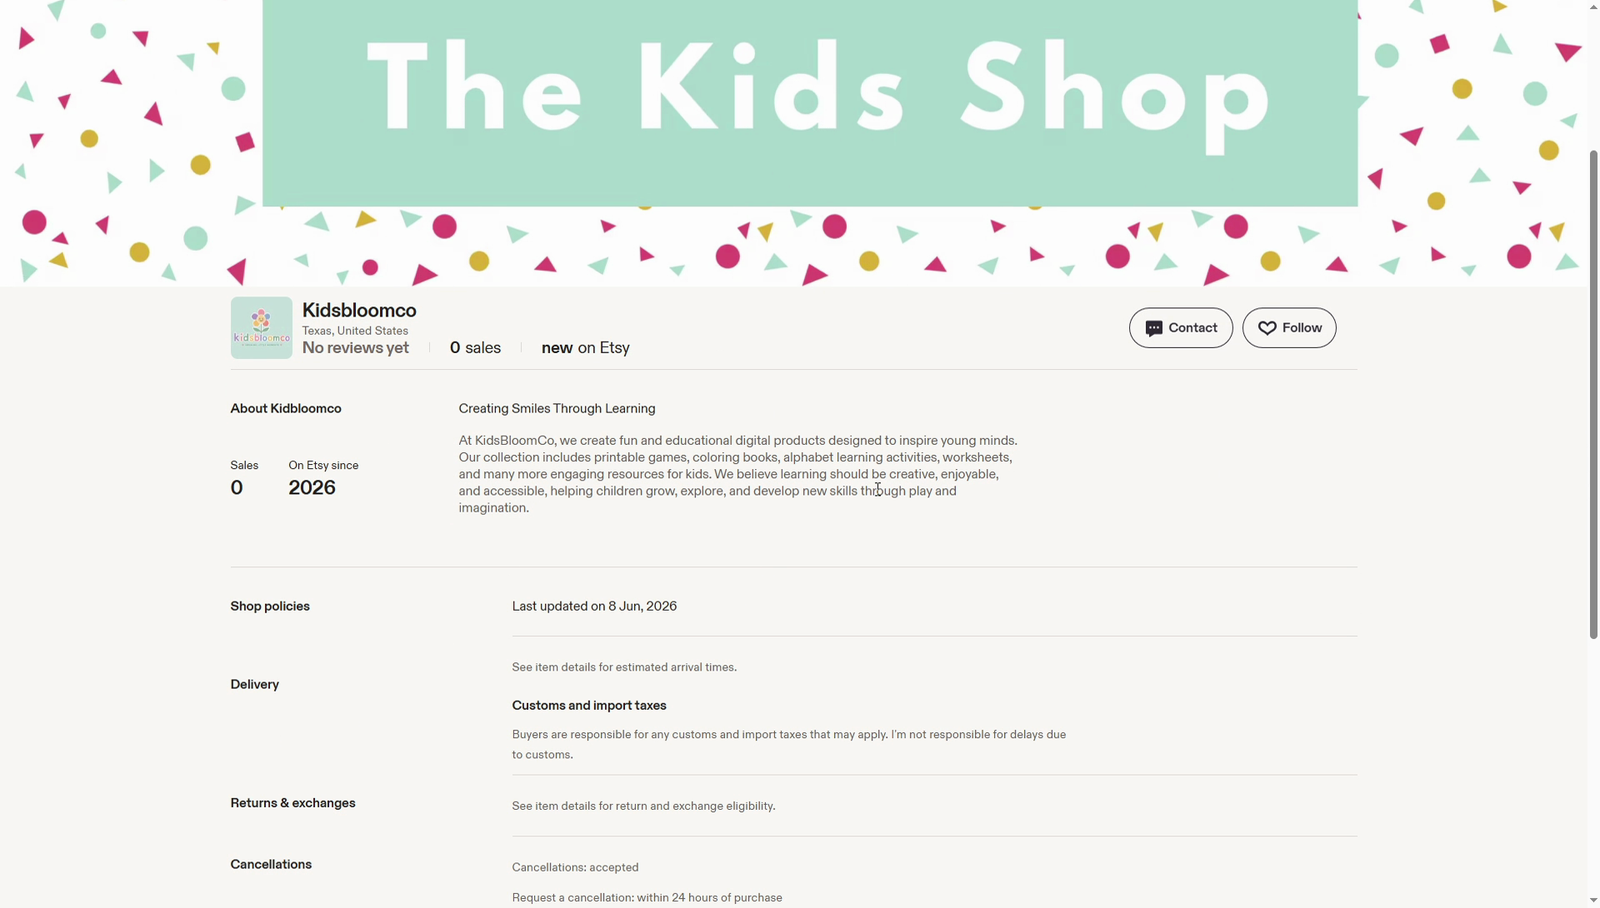
Your shop doesn’t need to look like a huge established brand on day one.
But it should look complete.
Think about what a customer sees when they first arrive.
Make sure you have:
Shop Logo
Keep it simple and readable.
Shop Banner
Use it to reinforce your shop’s overall style and communicate what you sell.
About Section
Give shoppers a little information about you and your business.
Shop Policies
Make sure the important information customers need is clearly available.
Consistent Branding
Try to keep your fonts, colors, and overall visual style consistent.
You don’t need complicated branding.
Consistency is more important than complexity.
Step 6: Create Your First Product

Now we get to the fun part.
Your first listing.
And here’s where I want you to change the way you think about Etsy.
You’re not simply uploading a file.
You’re creating a product page that needs to convince someone to click and buy.
Your listing should quickly answer:
- What is this?
- Who is it for?
- What’s included?
- How does it work?
- Why would I need it?
If a customer has to dig through your description to understand what you’re selling, you’ve made the buying decision harder than it needs to be.
Step 7: Create Strong Listing Images
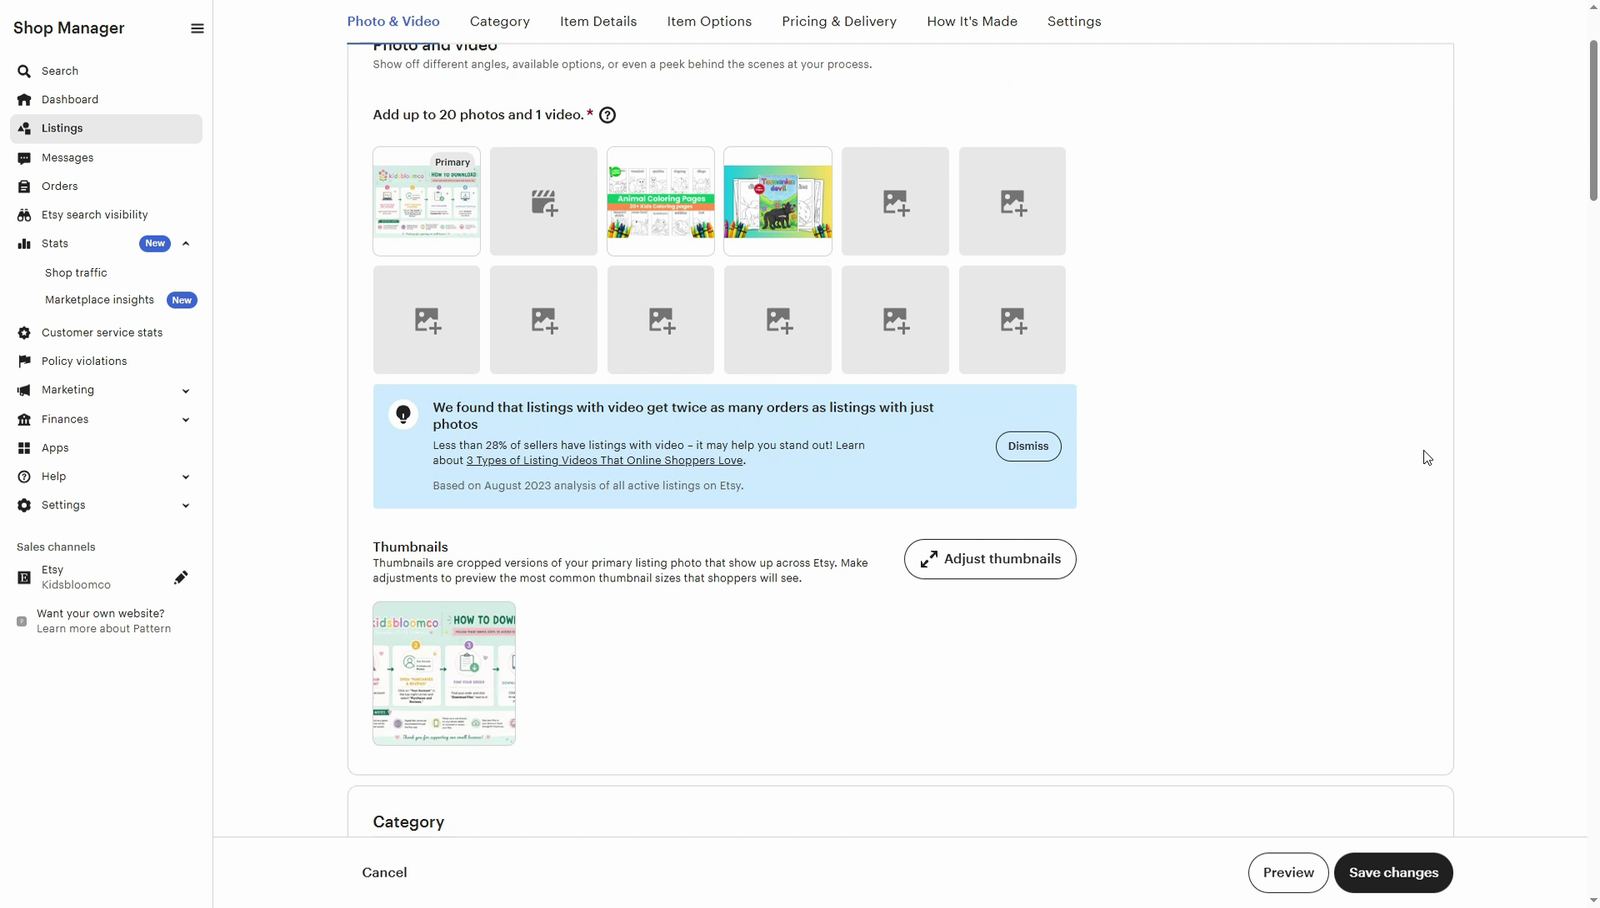
Your listing images are incredibly important for digital products.
A customer can’t physically hold your product.
So your images need to do the explaining.
If you’re selling a printable workbook, show several inside pages.
If you’re selling a template, show the different layouts.
If you’re selling a planner, show what the pages look like when printed or used.
You can include images that explain:
- What’s included
- Number of pages
- File type
- Sizes
- How the product works
- What the buyer receives
- Important instructions
Don’t just make your images pretty.
Make them useful.
Step 8: Write Your Etsy Listing for Search
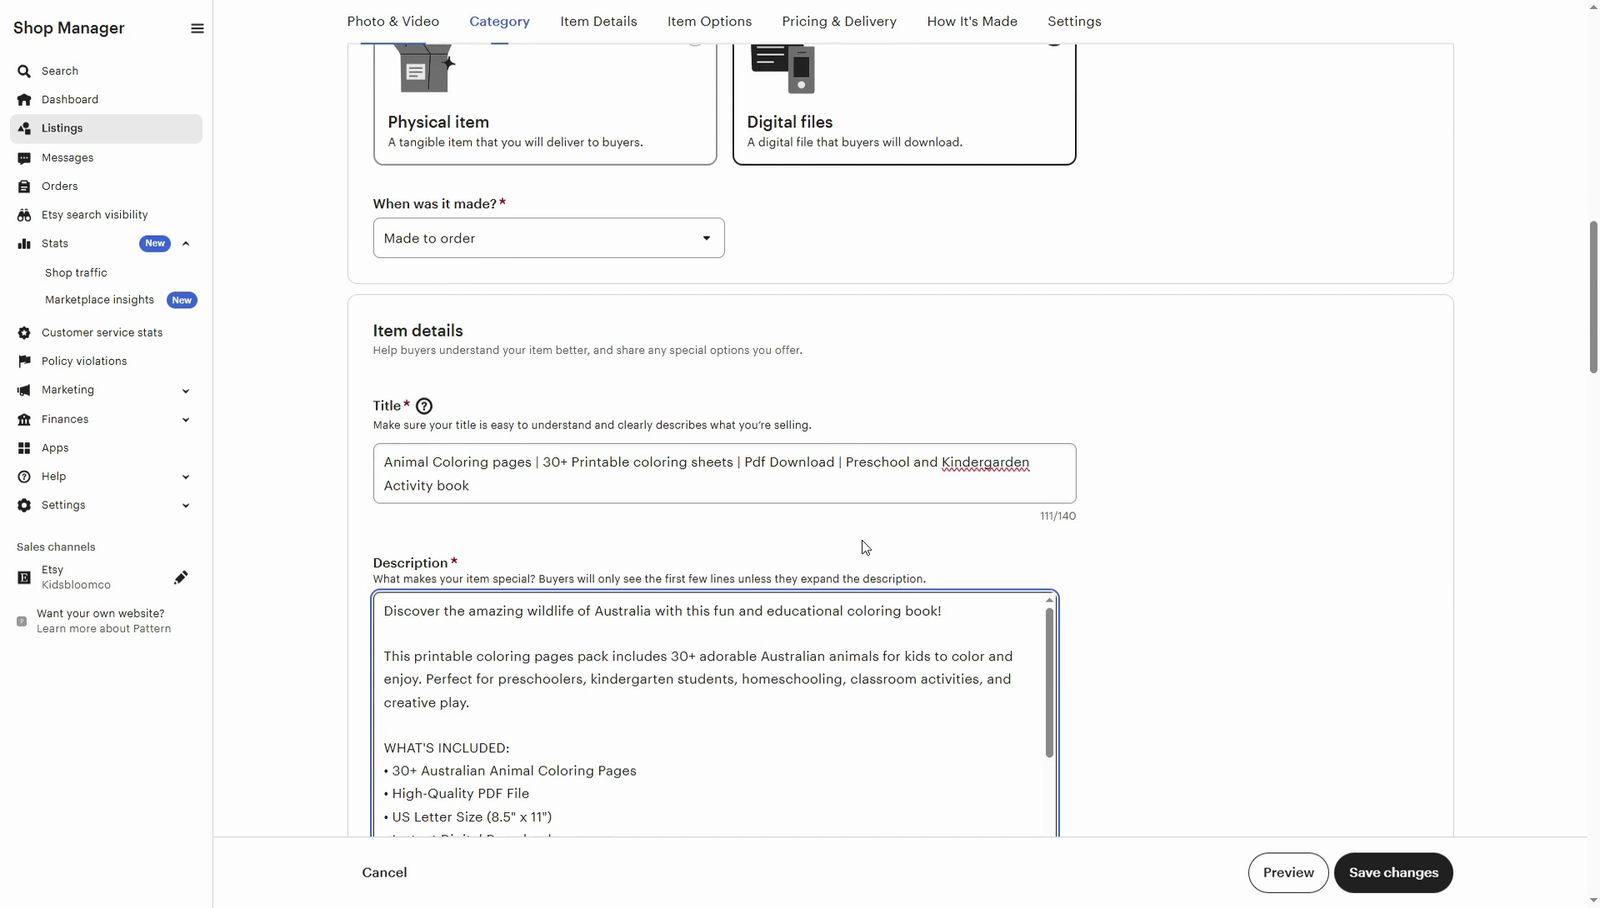
Now let’s talk about Etsy SEO.
SEO might sound complicated, but the basic idea is simple:
Help Etsy understand what you’re selling and help shoppers understand it too.
Use relevant search phrases naturally in your:
- Title
- Tags
- Description
- Categories
- Attributes
Think about how your customer would search for the product.
For example, someone looking for an alphabet printable might search for terms related to:
- Alphabet worksheets
- ABC worksheets
- Letter tracing
- Preschool worksheets
- Printable alphabet
You don’t need to cram every possible keyword into your listing.
Instead, focus on being:
Relevant + clear + specific.
Step 9: Don’t Stop at One Product
This is where many new Etsy sellers get discouraged.
They create one product.
Publish it.
Then wait for sales.
But one listing doesn’t give you much information.
As you create more relevant products, you can start learning which ideas attract attention and which ones don’t.
For example, if you’re selling preschool printables, your shop could eventually include:
- Alphabet worksheets
- Number worksheets
- Coloring pages
- Matching activities
- Tracing worksheets
- Activity books
- Reward charts
Now you aren’t relying on one product.
You’re building a collection around the same customer.
Step 10: Use Your First 30 Days to Learn
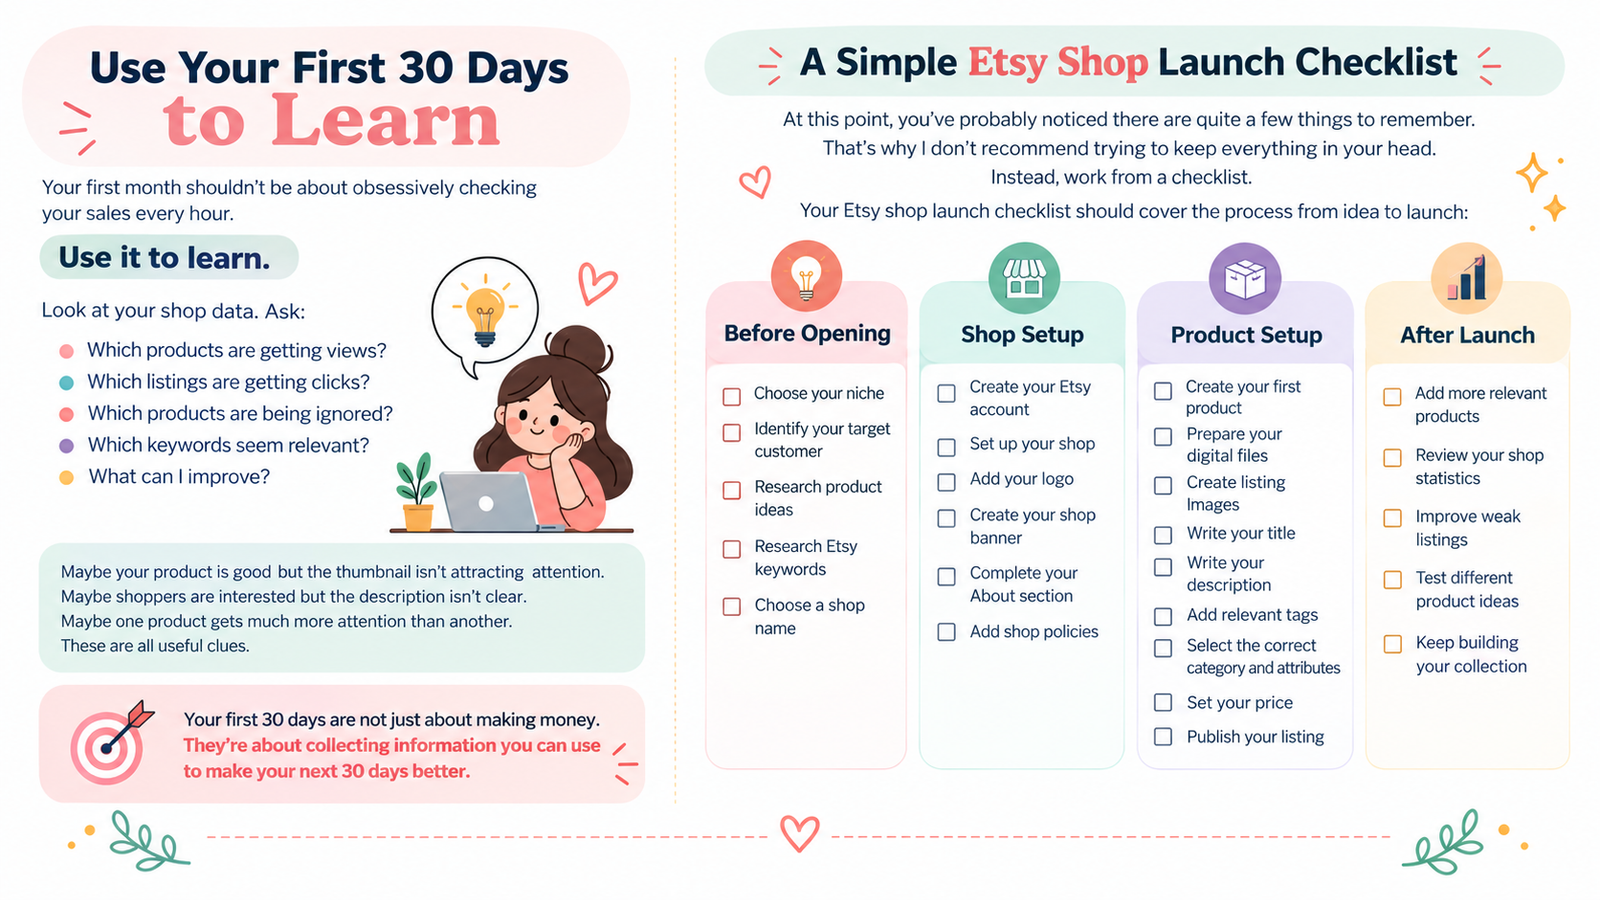
Your first month shouldn’t be about obsessively checking your sales every hour.
Use it to learn.
Look at your shop data.
Ask:
- Which products are getting views?
- Which listings are getting clicks?
- Which products are being ignored?
- Which keywords seem relevant?
- What can I improve?
Maybe your product is good but the thumbnail isn’t attracting attention.
Maybe shoppers are interested but the description isn’t clear.
Maybe one product gets much more attention than another.
These are all useful clues.
Your first 30 days are not just about making money.
They’re about collecting information you can use to make your next 30 days better.
A Simple Etsy Shop Launch Checklist
At this point, you’ve probably noticed there are quite a few things to remember.
That’s why I don’t recommend trying to keep everything in your head.
Instead, work from a checklist.
Your Etsy shop launch checklist should cover the process from idea to launch:
Before Opening
☐ Choose your niche
☐ Identify your target customer
☐ Research product ideas
☐ Research Etsy keywords
☐ Choose a shop name
Shop Setup
☐ Create your Etsy account
☐Set up your shop
☐ Add your logo
☐ Create your shop banner
☐ Complete your About section
☐ Add shop policies
Product Setup
☐ Create your first product
☐ Prepare your digital files
☐ Create listing images
☐ Write your title
☐ Write your description
☐ Add relevant tags
☐ Select the correct category and attributes
☐ Set your price
☐ Publish your listing
After Launch
☐ Add more relevant products
☐ Review your shop statistics
☐ Improve weak listings
☐ Test different product ideas
☐Keep building your collection
🎁 Get the Etsy Shop Checklist
If you don’t want to manually copy this list or worry about forgetting an important step, I’ve created a free Etsy Shop Checklist you can use while setting up your shop.
It’s designed to give you a simple roadmap instead of making you wonder:
“What am I supposed to do next?
Print it out, save it to your computer, or keep it beside you while you’re setting up your shop.
What Should You Sell on Etsy?
Once you’ve understood the setup process, there’s another question you need to answer:
What products should you actually create?
This is where your research becomes important.
You don’t need to find one magical product that is guaranteed to sell.
Instead, look for opportunities where you can combine:
Demand + a specific customer + a useful solution.
For example:
Parents + holiday activities + printable activity book
or
Small businesses + social media marketing + editable templates
or
Brides + wedding planning + printable planner
This approach gives you a much stronger starting point.
The Biggest Etsy Beginner Mistake
If I had to point out one mistake beginners should avoid, it would be this:
Trying to do everything at once.
You don’t need:
- 50 products.
- A perfect logo.
- A huge social media following.
- A complicated website.
- A massive email list.
- Or a perfect brand.
- Start smaller.
- Choose a customer.
- Choose a problem.
- Create one useful product.
- Get your shop set up.
- Publish.
- Learn.
- Then create the next product.
- That’s how you build momentum.
Final Thoughts
Starting an Etsy shop can seem complicated when you look at the entire process at once.
But when you break it into individual steps, it’s much more manageable.
- Choose your niche.
- Research your products.
- Understand your customer.
- Set up your shop.
- Create useful listings.
- Optimize them for search.
- Keep learning from your results.
You don’t need to have everything figured out before you begin.
Your first Etsy shop doesn’t need to be perfect.
It just needs to be good enough to launch and improve.
And when you’re ready to start, don’t forget to use the Etsy Shop Checklist to keep yourself on track.